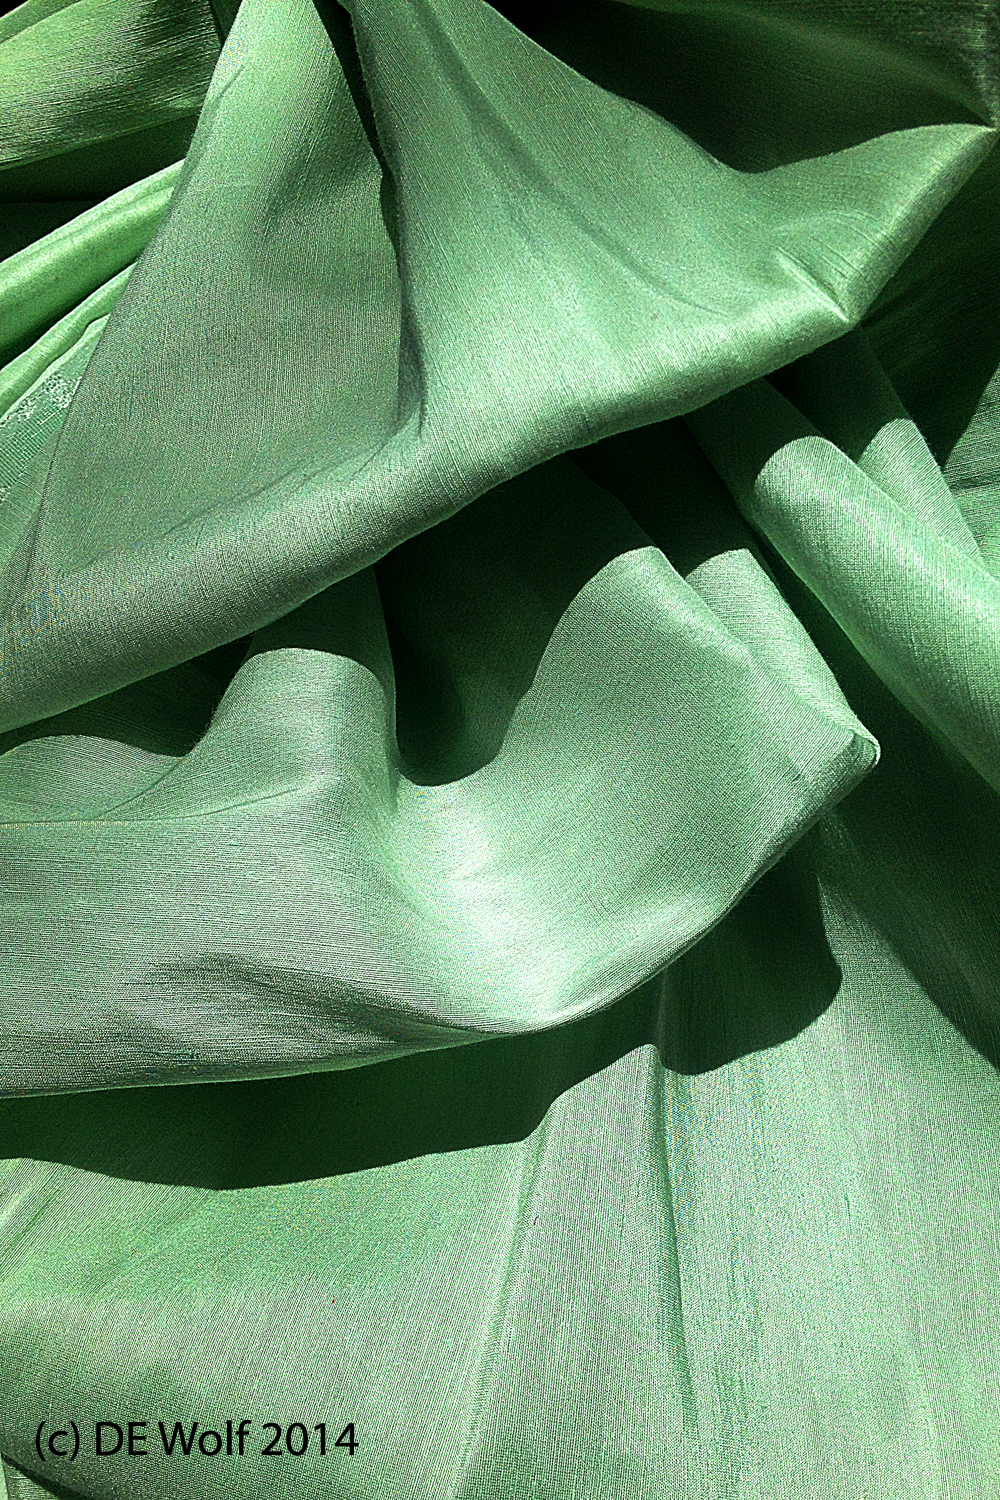
Today I’ve got an addition to my IPhone monotone images of folded fabric. The color of the day is mint green colored satin; so it is meant to be on the more subtle end of the spectrum compared to scarlet and indigo. Mint green speaks to spring and coolness, appropriate for the Northern hemisphere where we are very anxiously awaiting the coming of summer. the days are growing ever longer and we are now in the enjoying spectacular and perfect days.
Now just remember this – a kiss is just a kiss
I guess that hands down the image of week was taken on on April 30, 2014 and shows Hong Yaoming, who is deputy headmaster of Xianning Experimental Primary School, fulfilling a promise to his students by kissing a pig. The previous week at the school’s weekly flag-raising ceremony Hong promised that he would smooch the porcine provided students stopped littering on campus. Hong said the inspiration came from the story of an American teacher who promised to kiss a pig if more than 80 percent of his pupils passed their math exam.
So the next question where did the piggy come from. The 40 kg porker was provided by one of Hong’s friends. There are undoubtedly lots of jokes about a whole variety of movies, starting with Charlottes Web. The pig could not be reached for comment as to whether Hong was a good kisser – which is just fine since she’s not a swine to kiss and tell.
The mummy photograph fad
Well, it all gets even more bizarre – ain’t that always the case. In researching my two posts on mummies, I found two an interesting blog about the mummy photograph fad of the late nineteenth early twentieth century. The fad involved having yourself photographed in a mummy case and appears to have been started by American society lady Mrs. James P. Kernochan of New York on her return from a trip abroad that included Cairo.
A Cairo photographer obtained a mummy case and cut out the face. The subject (victim) would climb in and pose with their face sticking out of the hole. We still see this kind of gimmick at amusement parks. As the fad grew, intrepid photographers, especially those with access, to mummy cases took a photograph of a mummy case cut out the face and placed this over a portrait of the subject. What a darling present for one’s beau. Don’t you think!
Francis Frith on the Nile

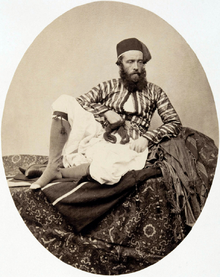
Francis Frith self portrait in Middle Eastern garb, 1857. From the Wikimediacommons and in the public domain because of agae. Oroginal photograph is in the Philadelphia Museum..
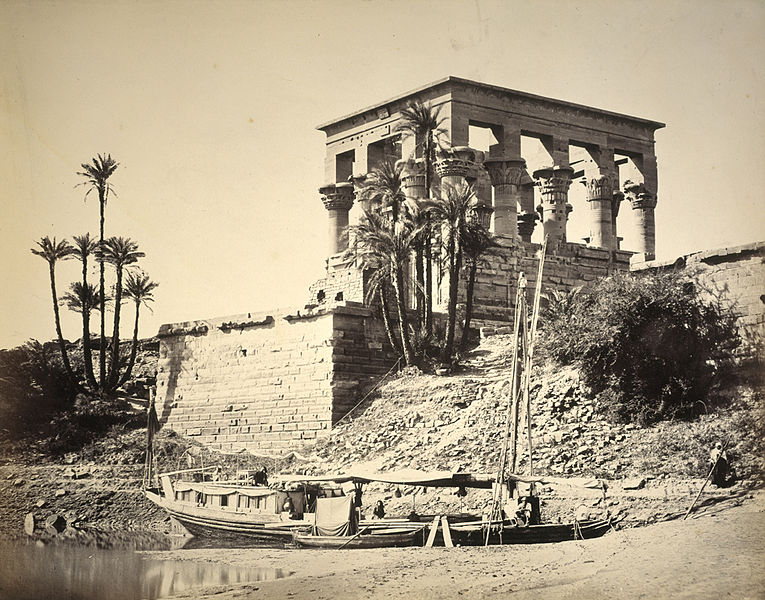
Our discussion on Friday of antique photographs of the unveriling of ancient Egyptian mummies got me thinking of Francis Frith (1822-1898). Frith was the first great photographer of ancient Egyptian monuments and the Nile Valley.
Francis Frith was an English photographer of the Middle East and many towns in the United Kingdom. Frith recognized that images of Egypt were in great demand by “armchair travelers.” From 1856 to 1860 he traveled in the Middle East with a huge (16″ x 20″) with a collodion process camera. This was a great accomplishment given the dust and heat of the desert. We have said this repeatidly of many of Frith’s contemporaries – yet in remains indisputable. Photographing in those days required extreme dedication to purpose, art, and technique.
In 1859, he opened the firm of Francis Frith & Co., which was the world’s first specialist photographic publisher, selling his beautiful images of Egypt and the Middle East. He then embarked on a colossal project, typical of the grand vision Victorian mindset – to photograph every town in the United Kingdom. These he sold as travel postcards. Eventually hiring a team of photographers, his studio became one of the largest in the world, with over a thousand shops selling his postcards.
Remarkably, his family continued the firm well into the twentieth century. It was sold in 1968 and closed in 1970 only to be was restored in a 1976 as The Francis Frith Collection, when this important archive was purchased by the tobacco company Rothmans.
In 1977, John Buck bought the archive from Rothmans and has continued to run it as an independent business since that time – trading as The Francis Frith Collection. As a result even today, over 150 years since it founding you can still find and purchase both nostalgic and historic images.

Figure 2 – The Hypaethral Temple, Philae, by Francis Frith, 1857; from the collection of the National Galleries of Scotland (on Flickr), from the Wikimedia commons and in the public domain because of age.
Ist kaputski with moose and squirrel
Hmm, a couple of weeks back we had the snowmobilers chasing a moose in Maine and this week we have a man taking a selfie while just about cheek to cheek with a squirrel. Well guess what? Neither episode ended so well. What’s wrong with these people? Are they candidates for this years Darwin Awards?
And it got me thinking, always a dangerous thing! When people post photographs or video that go “viral” was that (going viral) their intent all along? Or is it just caprice? I would not strictly rule out purposeful intent. I suppose that you could focus your raison d’etre to “viral” – all for a brief shining moment of fleeting fame and then a return to anonymous oblivion. There are clearly folks who follow this Kafkaesque path – to join the ignominious pantheon of those gone viral before them, whom no one remembers now. But for the most part, I believe that people just post because people just post. We don’t feel complete unless our friends, superficial and real, witness our antics, and no antic or event is too trivial to record.
It all kind of goes with photographs of dinner. About fifteen years ago my wife, son, and I were appalled by a couple who video recorded what they were having for dinner on vacation in Santa Fe. What a moronic thing to do, or so we thought. Now people do it all the time.
I suppose that as long as there are people who care, or fain to care, such pursuits are legitimate. A hundred years from now logs of Facebook activity will offer up valuable historic records of everyday life and everyday concerns. In that regard they are automatically placed in an annotated context. And these images will speak to us, perhaps a bit more clearly, than the glimpses of nineteen century life that everyday photographs from that period do.
Photographs of subjects not meant to be seen

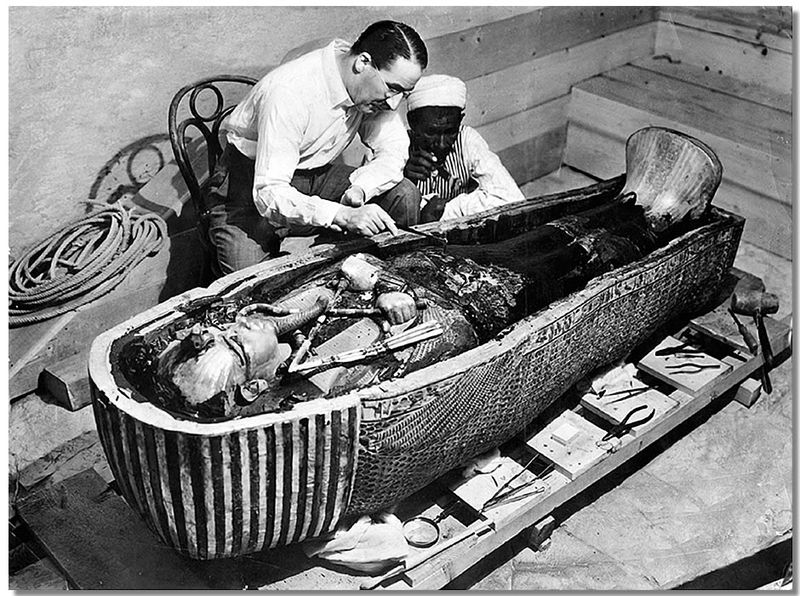
Figure 1 – Howard Carter opens the innermost shrine of King Tutankhamen’s tomb near Luxor, Egypt (1922). From the Wikimediacommons, original photograph from the NY Times archive and in the public domain because of the date of publication.
It was announced this past Monday, by Egypt’s Minister of Antiquities Dr. Mohamed Ibrahim, that mummies of approximately fifty ancient Egyptians were discovered and uncovered in a massive tomb in Luxor’s Valley of the Kings. Among these embalmed remains were princesses, princes, and well-preserved infants from the time of the Pharaohs and these were believed to be relatives of 18th dynasty Kings Thutmose lV and Amenhotep lll, who ruled in the 14th century BC.
As is usually the case, the Tomb had been raided both in ancient times and as recently as the 19th century by grave robbers in search of treasure. As a result the scene is one of chaos, yet still extremely significant archaeologically. Images of this chaos are both thought provoking and reminiscent of images from almost a hundred years ago showing the excavation and unwrapping of Egyptian pharaoh Tutankhamen by by Howard Carter and George Herbert, 5th Earl of Carnarvon.
Back in 1922 the discovery of King Tut’s tomb caused quite a stir. It and the movie that followed spawned the bogus concept of the Curse of the Mummy, and of course, an endless litany of plays on the word “mummy.” Today there is also the interesting connection between Earl Carnavon, Highclere Castle, and the British television series “Downton Abbey.” Carnavon was the real thing!
A striking theme in all of this is the fundamental ambiguity that archaeology creates. These are the tombs, the final resting places, of actual people, who once lived. From where comes the right to excavate their graves and put their bodies on display in some museum? Is there some magic date at which these tombs cease to be private and suddenly become open to the public. It is a strange dichotomy between the pursuit of knowledge of the sacred and overt violation and sacrilege.
At a further level, the photographs are truly fascinating and hold their own particular ambiguity. These tombs were never meant to see the light of day or even of artificial light. They were passed on to the realm of the dead, indeed they became of that realm, and their illumination was never meant to be, we were not meant to see them. And yet here we do see them, here we do photograph them. These are truly photographs that were not meant to be taken of subjects not meant to be seen.
Change your perspective or “Zip it!”
BBC News has a weekly feature or photo challenge. A recent one was called “Different Angle,” and it challenged readers, or photographers, to put a different perspective or spin on their images. I am always amazed at some of the entries. And this week I was struck by this wonderful image by Edward Diaz which he calls “Zippity Do Da.” Diaz very cleverly created a zipper out of a pencil sharpener and his grandchildren’s colored pencils. Indeed, when I looked at the thumbnail, I didn’t realize that it was anything more than a colorful zipper. So when I blew it up I took a double take.
Diaz relates the fact that it has been a long hard winter in the United States and one day he was playing with his camera and the pencils. I can certainly relate both to the weather woes and the photograph.
I think that this points to the value of challenging yourself photographically with seeming mundane subjects. Cold winter Sundays can be emotionally challenging. At some point you start to feel like you’ve photographed way to much ice and snow. It clearly testifies to the harshness of this past winter that it is May and we are still thinking and talking about it.
Creating a sense of power and effortless motion
For some reason this past month I’ve seen an unusual number of photographs that I love. So it’s been difficult to pick which ones to write about. Today I’d like to point my readers to this great photograph by Clive Rose for Getty Images of swimmer Nail O’Leary competing in the men’s 200 m backstroke at the British Gas 2014 Swimming Championships in Glasgow, Scotland on April 14.
The image is appealing on several levels. First, there is aqua blue pastel coloration. Then there are the combined distortions of the aqueous refraction and the stretching due to the swimmer’s motion. These give the image another worldliness where O’Leary looks almost like and alien. This is turn puts a big question mark on the image. What is it about and what exactly does it mean? I think that it is a wonderful example of what can be accomplished with sports photography, where the goal is to give a sense of power and seeming effortless motion.
Oh whoops! And you think that you’re having a bad day?
I don’t usually post fresh news stories. However, I am going to make an exception today with this photograph of a plane that rolled off the runway and into a small pond in Valusia County, Florida,
The Cessna 525 rolled into a Florida pond this past Saturday morning, after going off the end of the runway, the Federal Aviation Administration reports. Since the three people aboard got out safely, we can point out that somebody was having a bad day. Indeed, I am reminded of the children’s story, “Alexander and the Terrible, Horrible, No Good, Very Bad Day.” And maybe this is an example of where a photograph makes us pause and take stock of our lives, where it puts things in proper perspective. You think that you’re having a bad day?

